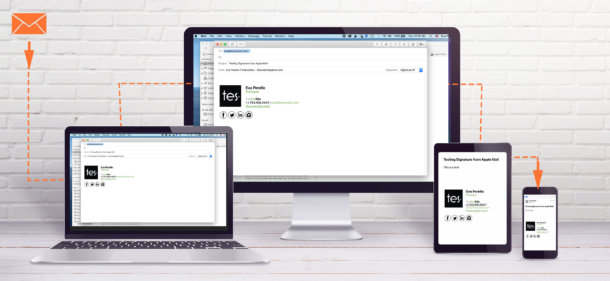
Why do email signature images don’t display on the phone?
Is my email signature displaying properly on other inboxes?
Over years, and still now, users have had this issue. If you are one of them, there is an explanation and most important, there is a solution for that.
As a part of my service, I decided to set a kind of tutorial for my clients to explain the basis and steps they must follow to set their inboxes (desktop and mobile) and I’m thrilled to share this with you.
Why does this happen?
Basically, the images of your signature must be on the internet so they can be displayed on every device and inbox where your email lands.
In other words, image files don’t travel online as text does. Depending on the email platform you use, the recipients may or may not see the images of the signature. If so, they might see only an empty placeholder instead. To solve or at least minimize the risk of failure, each inbox should be able to download from the internet the logo, icons or any image of the signature.
This might sound like a complicated process but it’s not.
Take a quick look below to the steps with visuals of the tutorial I created for my clients.
You may also download the PDF in High-Res and for FREE at the end.
If you still need assistance on that, just email me to eva@theevasite.com. I’ll be happy to help 🙂
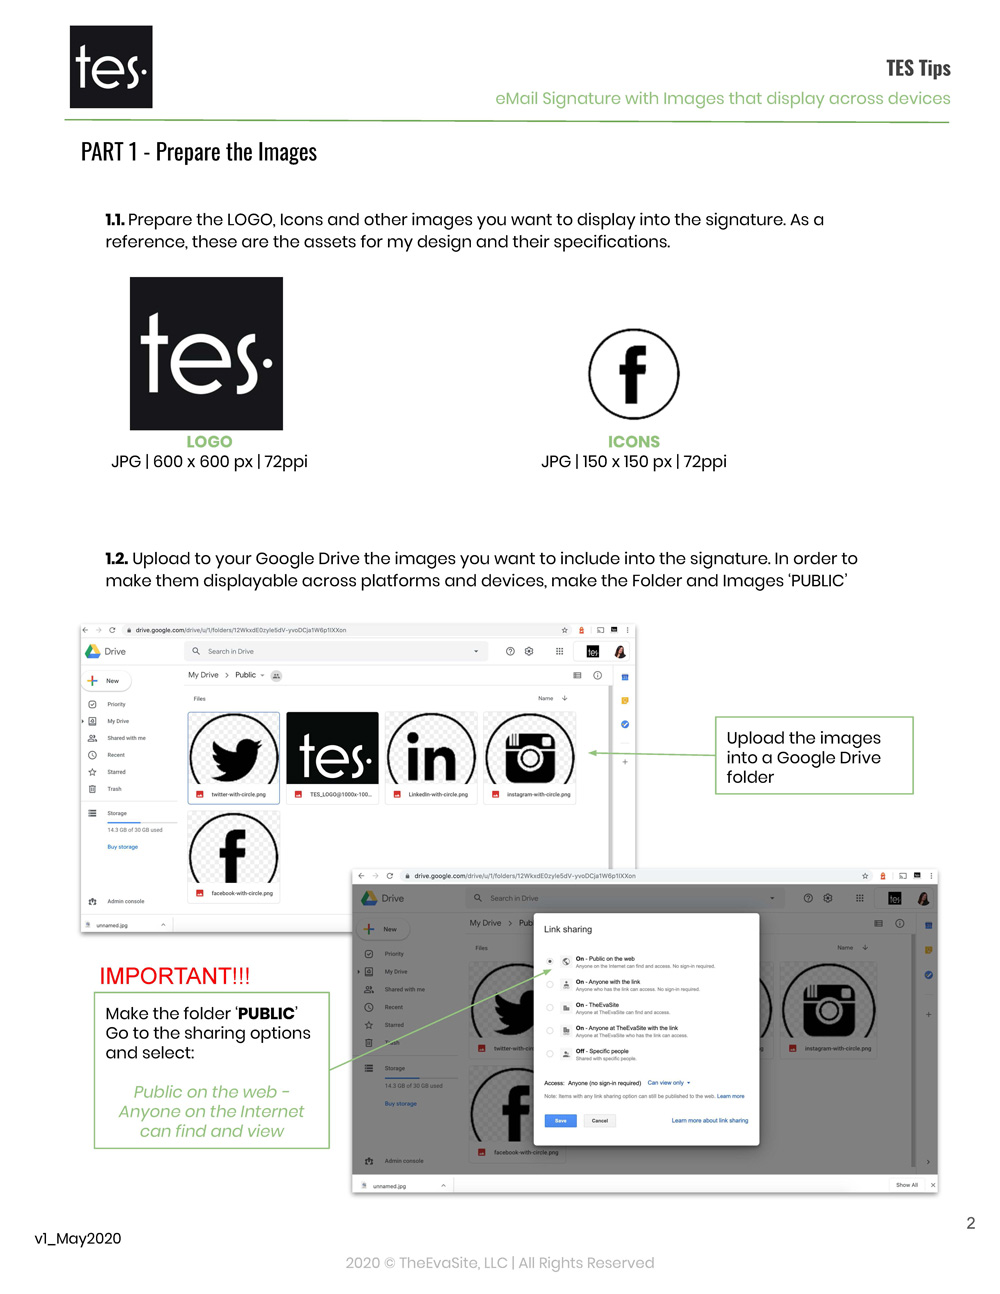
STEP 1 – Prepare the Images
1.1. Prepare the LOGO, Icons and other images you want to display into the signature. As a reference, these are the assets for my design and their specifications.
1.2. Upload to your Google Drive the images you want to include into the signature. In order to make them displayable across platforms and devices, make the Folder and Images ‘PUBLIC’
Click on the image to enlarge >
STEP 2 – Prepare the Signature
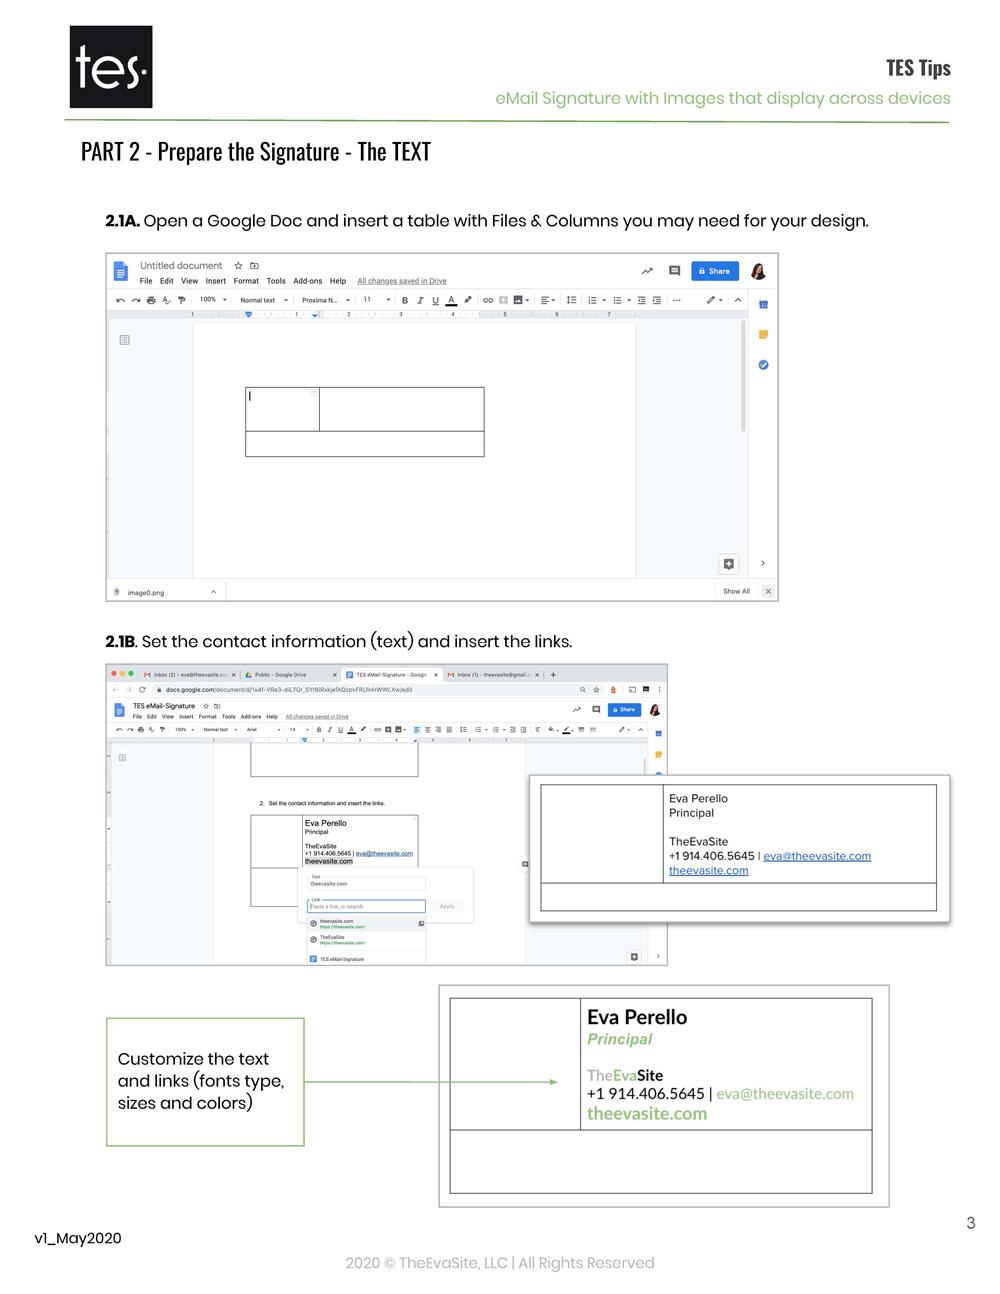
2.1 The TEXT
2.1A. Open a Google Doc and insert a table with Files & Columns you may need for your design.
2.1B. Set the contact information (text) and insert the links.
Click on the image to enlarge >
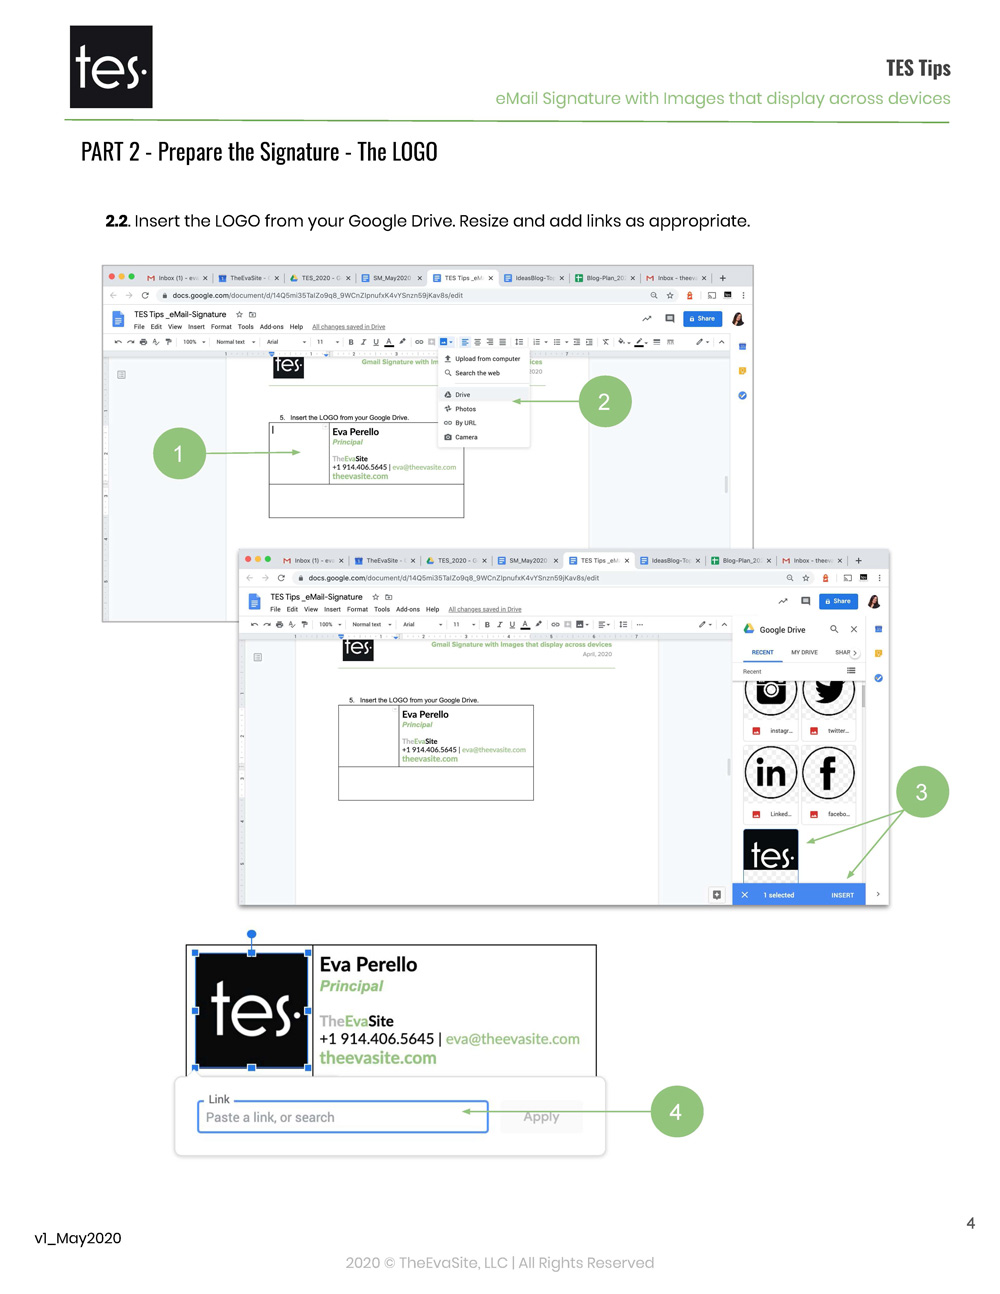
2.2 The LOGO
Insert the LOGO from your Google Drive. Resize and add links as appropriate.
Click on the image to enlarge >
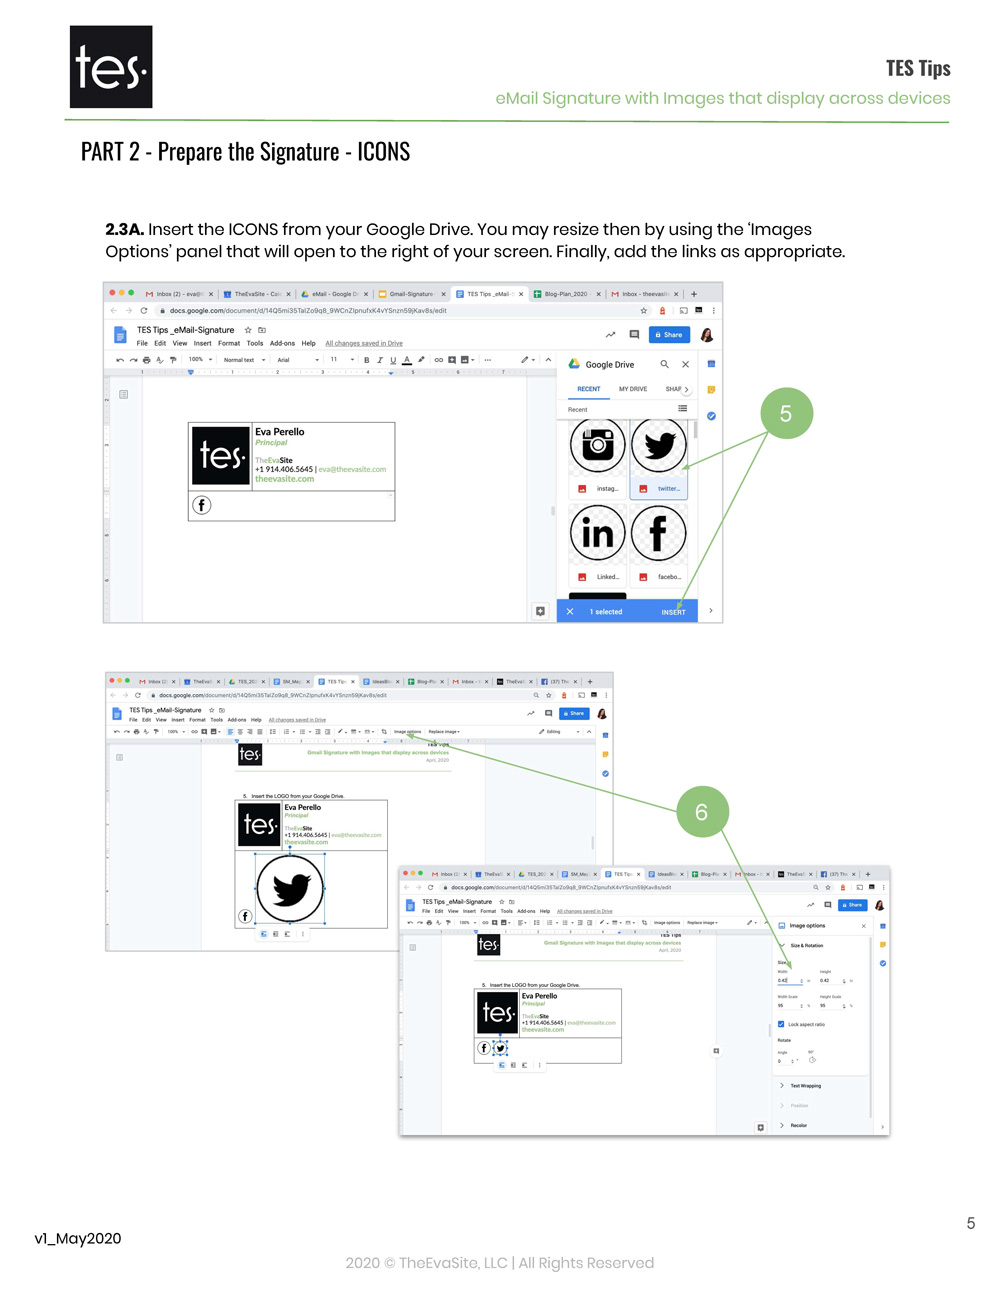
2.3 The ICONs
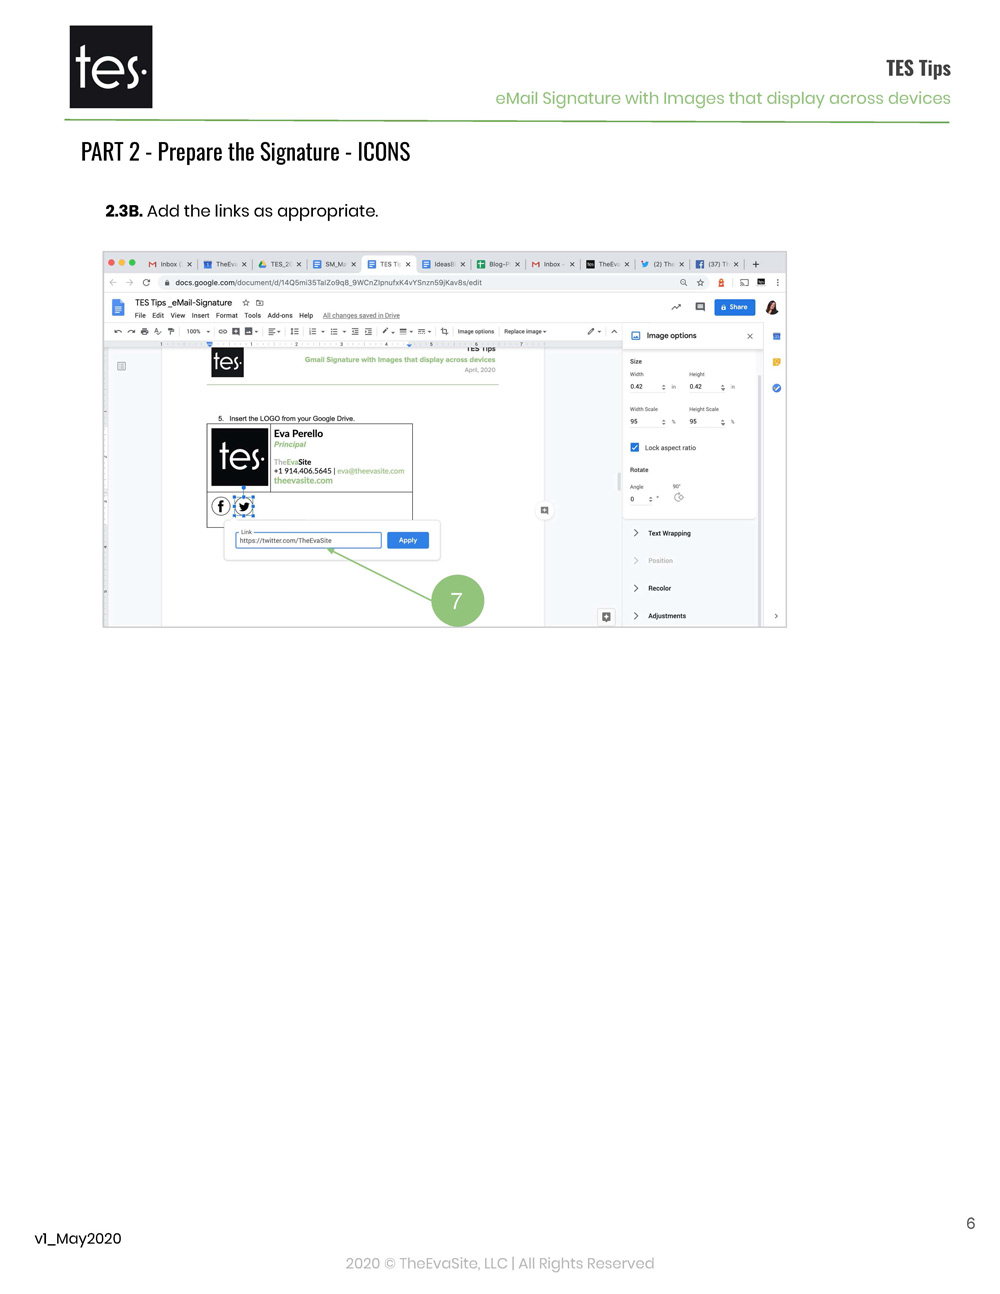
2.3A. Insert the ICONS from your Google Drive. You may resize then by using the ‘Images Options’ panel that will open to the right of your screen. Finally, add the links as appropriate.
2.3B. Add the links as appropriate.
Click on each image to enlarge >
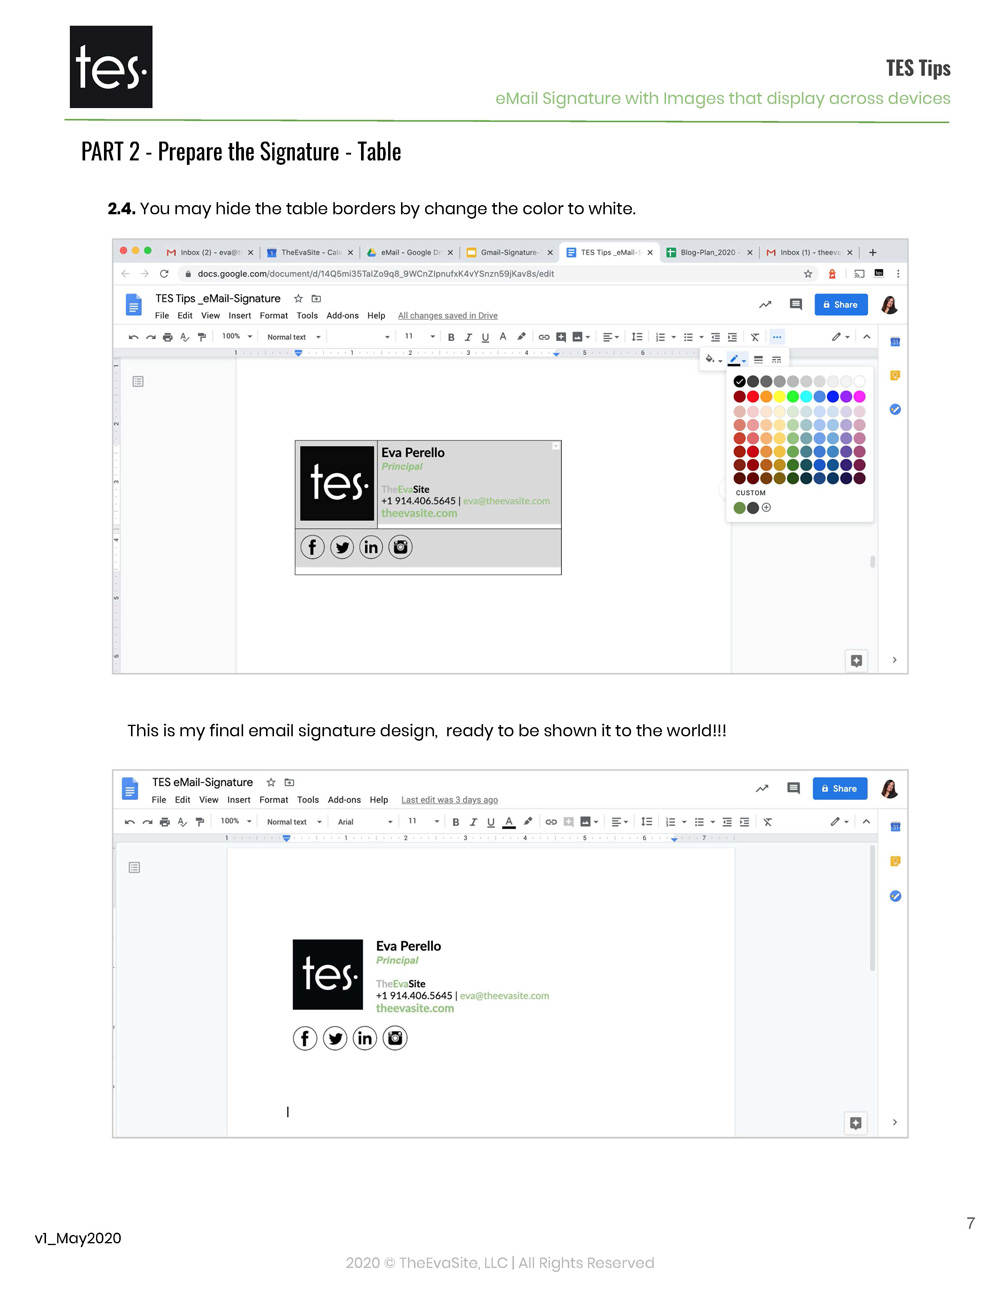
2.4 The TABLE
You may hide the table borders by changing the color to white.
Click on the image to enlarge >
STEP 3 – Setting the Signature in your Inboxes
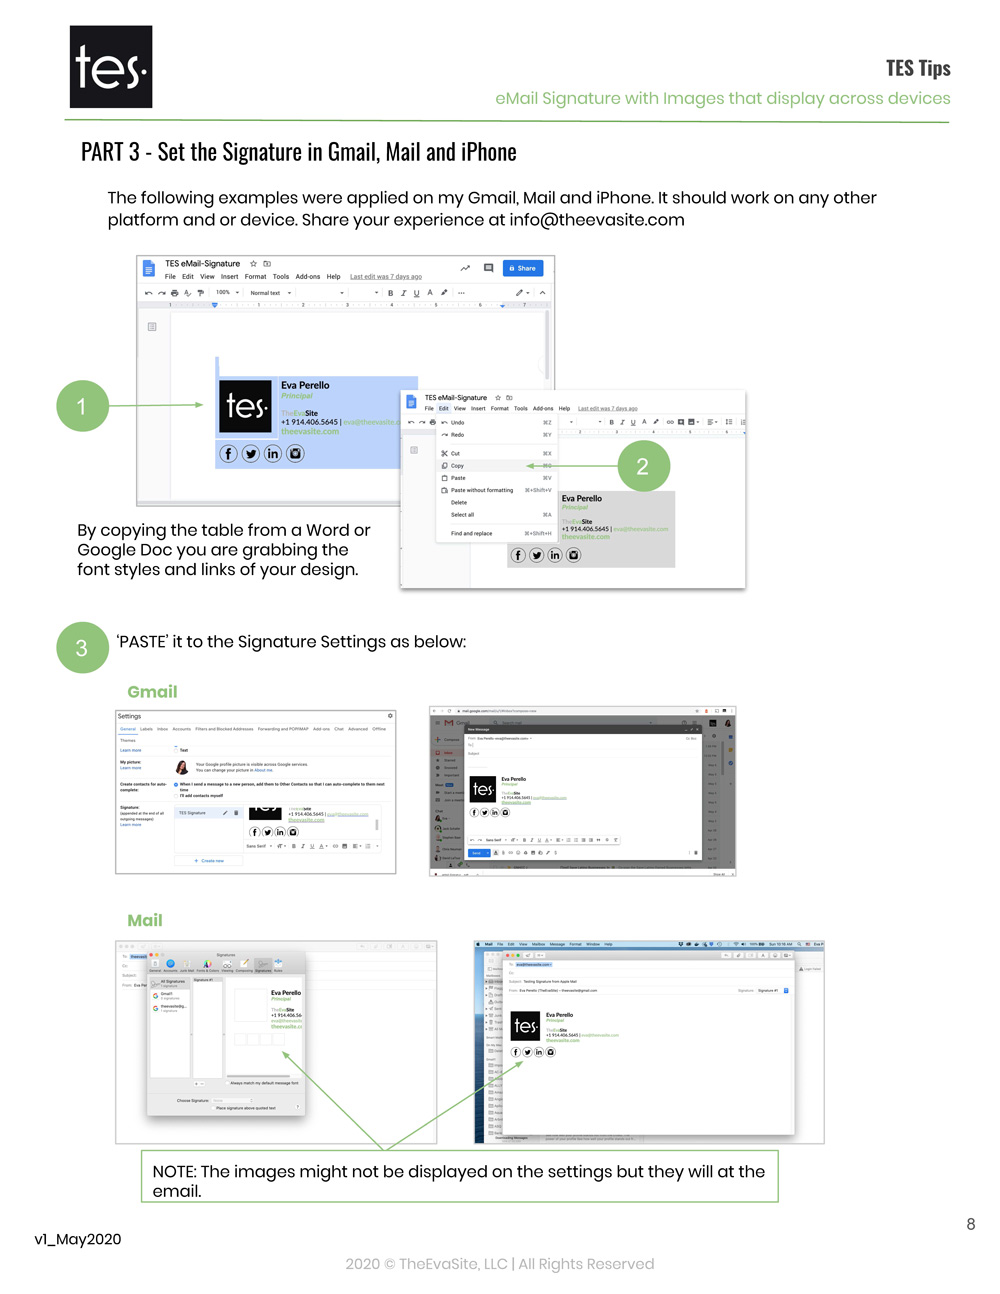
- The following examples were applied on my Gmail, Mail and iPhone. It should work on any other platform and or device. Share your experience at info@theevasite.com
- By copying the table from a Word or Google Doc you are grabbing the font styles and links of your design.
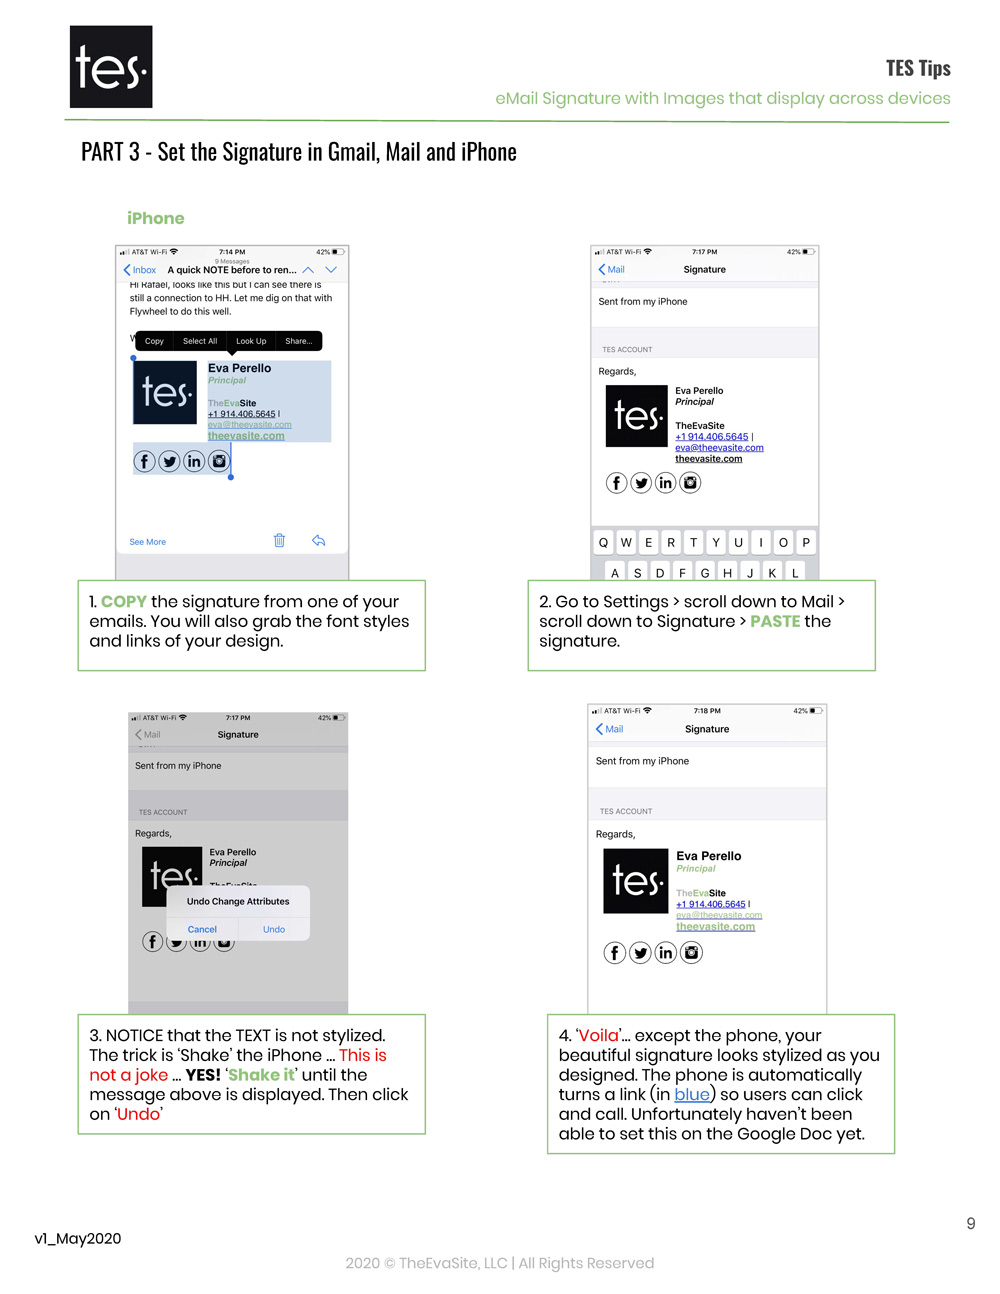
- ‘PASTE’ it to the Signature Settings Inbox.
Click on each image to enlarge ↓

